The greatest myth in photography is that you need expensive gear for professional results; the truth is that mastery of light and composition is what separates an amateur snapshot from a stunning work of art.
- Timing is more critical than your camera’s sensor; shooting in the “golden hour” sculpts the landscape with light, creating texture and depth that even the best gear can’t fake in harsh daylight.
- Composition is a language, not a single rule. Moving beyond the “rule of thirds” and understanding techniques like leading lines and framing unlocks far more dynamic and compelling images.
Recommendation: Instead of saving for a new camera, invest your time in learning to see. Dedicate your next outings to studying how light falls on a single subject at different times of day.
For many hobbyist photographers and nature lovers, there is a familiar pang of disappointment. You stand before a majestic mountain range or a serene coastline, the scene is breathtaking, but the photo you take with your smartphone or entry-level camera feels flat, lifeless—a pale imitation of the moment. The common advice is often a siren’s call to the wallet: “You need a better camera,” “Get a faster lens,” “Invest in expensive filters.” This path suggests that the quality of your art is directly proportional to the price of your tools.
But what if that’s a fundamental misunderstanding of what makes a photograph compelling? What if the key to unlocking professional-quality images isn’t in the gear you hold, but in the knowledge you possess? The true craft of landscape photography lies in a deeper understanding of light, a more intentional approach to composition, and a disciplined hand in post-processing. It’s about learning to work *with* the limitations of your equipment through what I call intentional compromise and turning them into creative strengths.
This guide is built on that very principle. We will deconstruct the techniques that professional photographers use to create breathtaking images, focusing not on what to buy, but on what to learn. We will explore how to sculpt landscapes with light, tell compelling stories through composition, protect your gear in hostile environments, and edit your photos with an artist’s touch. Forget the gear lust; it’s time to invest in your eye.
This article will provide a roadmap to elevate your photography, from understanding the non-negotiable power of light to the subtle art of monetizing your best work. Let’s delve into the skills that truly matter.
Summary: Elevating Your Photography Beyond Your Equipment
- Why the “Golden Hour” Is Non-Negotiable for Stunning Nature Shots?
- How to Use the Rule of Thirds to Transform Boring Horizons into Art?
- Grand Vistas vs. Macro Details: Which Tells a Better Story of the Landscape?
- The Moisture Mistake That Ruins Camera Sensors in Humid Environments
- How to Edit Green Tones So They Don’t Look Radioactive?
- Guided Tours vs. Solo Wandering: Which Yields Deeper Cultural Insights in Europe?
- Limited Edition Print vs. Original: Which Is the Smarter Buy for a $1,000 Budget?
- How to Choose a Craft Workshop That Will Actually Teach You a New Skill?
Why the “Golden Hour” Is Non-Negotiable for Stunning Nature Shots?
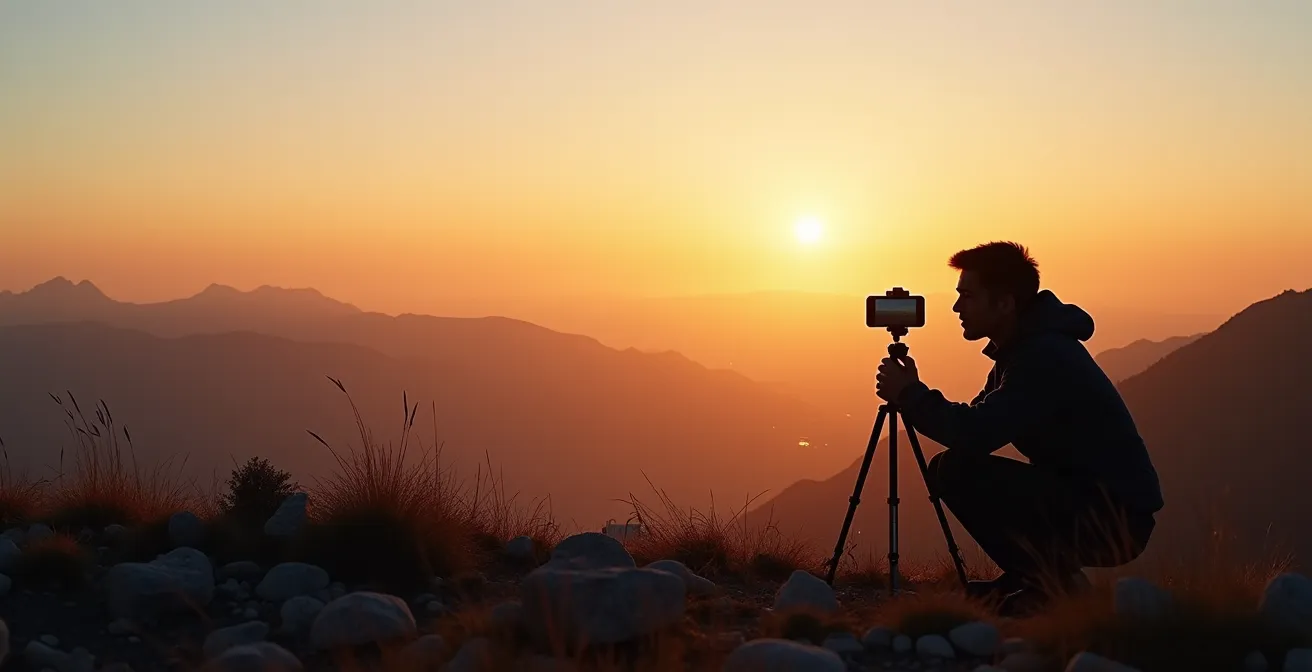
The term “golden hour” is ubiquitous in photography, but it’s often treated as a mere aesthetic preference. For the photographer with accessible gear, it is a technical necessity. During this period—the first hour after sunrise and the last before sunset—the sun is low in the sky, creating soft, diffused, and directional light. This light is forgiving to camera sensors with limited dynamic range, as it reduces the harsh contrast between highlights and shadows that plagues midday shots. Instead of blown-out skies and crushed blacks, you get a scene bathed in a warm, manageable glow.
This soft light is a master sculptor. It rakes across the landscape, revealing textures in rock, sand, and foliage that are invisible under the flat, overhead light of noon. It’s this light sculpting that creates a sense of three-dimensionality and depth, making an image feel tangible and immersive. The proof is undeniable, as shown in a professional study of Death Valley’s dunes. Photographers captured the same scene at midday and during the golden hour; the midday shot was flat and uninspired, while the golden hour image was rich with dramatic, three-dimensional texture, all using the same equipment. It proves that timing is a more powerful tool than a high-end sensor.
Furthermore, the duration of this magical light is not a fixed 60 minutes. Research from landscape photography experts shows that golden hour can last up to 6 hours in Arctic winter conditions versus a fleeting 15 minutes at the equator. This requires planning and location-specific knowledge, transforming photography from a reactive act to a deliberate, planned one. To truly leverage this time, consider this workflow:
- Embrace the Blue Hour: Arrive 45 minutes before sunrise. The cool, even tones of the “blue hour” can be more forgiving for budget sensors than even the golden hour, effectively masking noise and dynamic range limitations.
- Eliminate Shake: Use your camera’s 2-second timer or a smartphone’s voice control feature. This achieves the same stability as an expensive remote trigger, which is crucial in low light.
- Bracket Manually: Since budget cameras often lack advanced auto-bracketing, take 3-5 shots of the same scene at different exposure settings. This manual process mimics high-end HDR functionality.
- Stack for Success: Use free software like Luminance HDR or mobile apps to stack your bracketed images. This post-processing step allows you to overcome the dynamic range limitations of your sensor, creating one perfectly exposed image.
How to Use the Rule of Thirds to Transform Boring Horizons into Art?
The Rule of Thirds is often the first compositional tool a new photographer learns, and for good reason. It’s a simple, effective way to create balance and visual interest. The concept is to imagine your frame divided into nine equal segments by two horizontal and two vertical lines. By placing key elements of your scene along these lines or at their intersections, you create a more dynamic and pleasing composition than simply centering the subject. For landscapes, this often means placing the horizon on either the upper or lower horizontal line, but never in the middle.
This simple adjustment instantly transforms a static, boring snapshot into a more thoughtfully constructed image. It forces you to make a decision: is the sky or the foreground more interesting? By dedicating two-thirds of the frame to the more compelling element, you begin to tell a story and guide the viewer’s eye. While it’s a fundamental starting point, treating it as an unbreakable law is a mistake. The true art of composition is knowing which tool to use for the right situation.
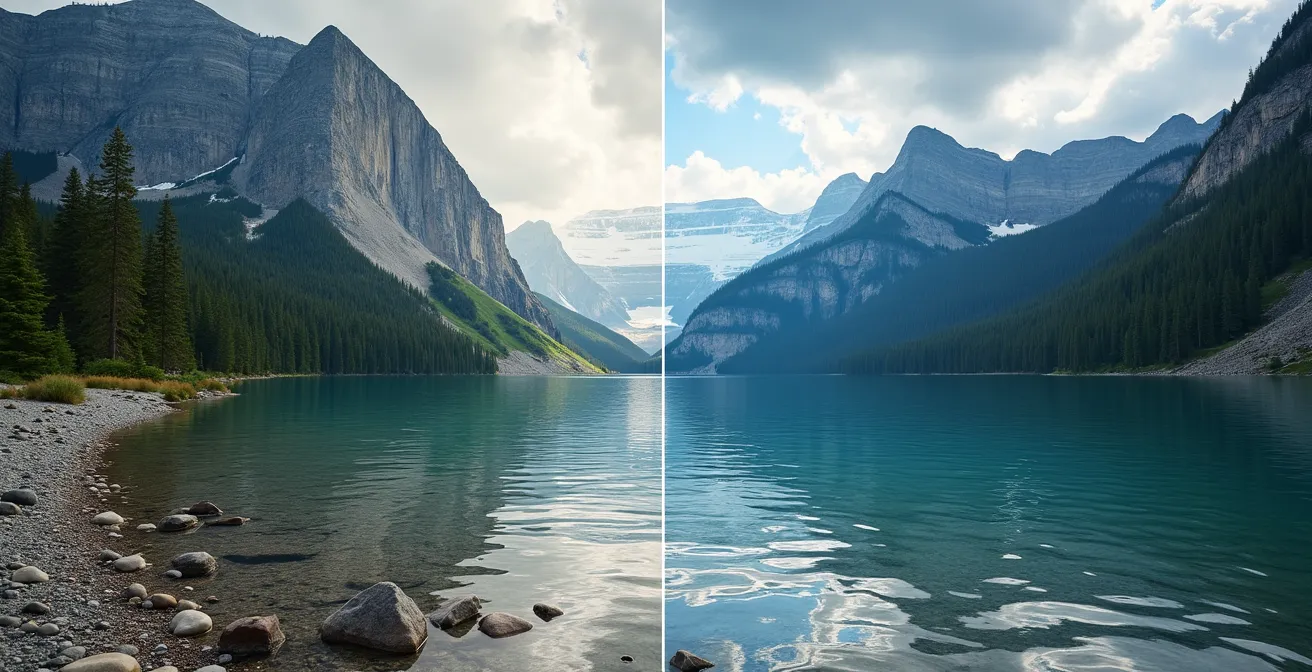
As the image above suggests, composition is about arranging elements to create a feeling. The Rule of Thirds is just one of many techniques in your visual vocabulary. Understanding when to use it and when to break it is a sign of a developing artistic eye. For example, a perfectly symmetrical reflection on a lake often benefits from a centered composition to emphasize its stability and power. A winding road or river begs for the use of leading lines to draw the viewer deep into the frame. An archway or a cluster of trees can be used as a “frame within a frame” to add depth and context.
The goal is to move from rote application of one rule to an intuitive understanding of many. This table illustrates how different techniques serve different narrative purposes.
| Technique | Best Use Case | Visual Impact | Difficulty for Beginners |
|---|---|---|---|
| Rule of Thirds | General landscapes, horizons | Balanced, pleasing | Easy |
| Center Composition | Symmetrical subjects, reflections | Powerful, stable | Easy |
| Leading Lines | Roads, rivers, paths | Dynamic, depth-creating | Moderate |
| Frame Within Frame | Archways, trees, caves | Layered, immersive | Moderate |
| Golden Ratio | Complex natural scenes | Naturally flowing | Advanced |
Grand Vistas vs. Macro Details: Which Tells a Better Story of the Landscape?
A common trap for aspiring landscape photographers is to focus solely on the “grand vista”—the sweeping panoramic shot that captures the entire scene. While these images are essential for establishing a sense of place and scale, they often tell an incomplete story. A truly compelling narrative of a landscape is woven from both the epic and the intimate. The grand vista is the establishing shot, but the macro detail reveals the character and soul of the place.
Think of it as cinematography. A film about a forest might open with a wide shot of the entire valley, but it will quickly cut to close-ups of a dewdrop on a leaf, the texture of bark, or a mushroom pushing through the soil. This narrative duality is what creates a rich, multi-layered experience for the viewer. Your smartphone is surprisingly adept at this; its wide-angle lens is perfect for the grand view, but its ability to focus closely allows you to capture the intricate details that give a location its unique identity.
Are you in a coastal area? Don’t just shoot the sunset over the ocean. Get down low and capture the pattern of ripples in the sand, the texture of a weathered seashell, or the way light filters through a piece of sea glass. Are you in the mountains? Complement your wide shots of the peaks with close-ups of a resilient alpine flower, the geometric patterns in a piece of granite, or the texture of moss on a fallen log. These small details ground the grander scene in reality and evoke a much deeper emotional connection. They are the story’s supporting characters, and as professional photographers from the Visual Wilderness Photography Guide state, they are indispensable.
The most powerful storytelling comes from combining both grand vistas to set the scene and intimate detail shots to reveal character – think of it as establishing shots and character details in cinematography.
– Professional landscape photographers, Visual Wilderness Photography Guide
The Moisture Mistake That Ruins Camera Sensors in Humid Environments
While we often focus on the creative aspects of photography, protecting your gear is a technical skill that is paramount, especially when working with electronics that may not be weather-sealed. The single most common and costly mistake is rapid temperature change. According to camera maintenance specialists, moving your equipment from a cool, air-conditioned space (72°F) to a warm, humid environment (95°F) creates a significant internal condensation risk in under 60 seconds. This moisture can form directly on your sensor and internal electronics, leading to fungal growth, short circuits, and costly repairs.
This process of environmental acclimatization is not optional; it’s a critical discipline. You must treat your camera as a sensitive instrument that needs time to adjust. The simplest method is to seal your camera in a plastic bag *before* you leave the cool environment. This allows the camera’s temperature to equalize slowly with the outside air without the humid air coming into direct contact with its cold surfaces. Only after about 30 minutes should you remove it from the bag.
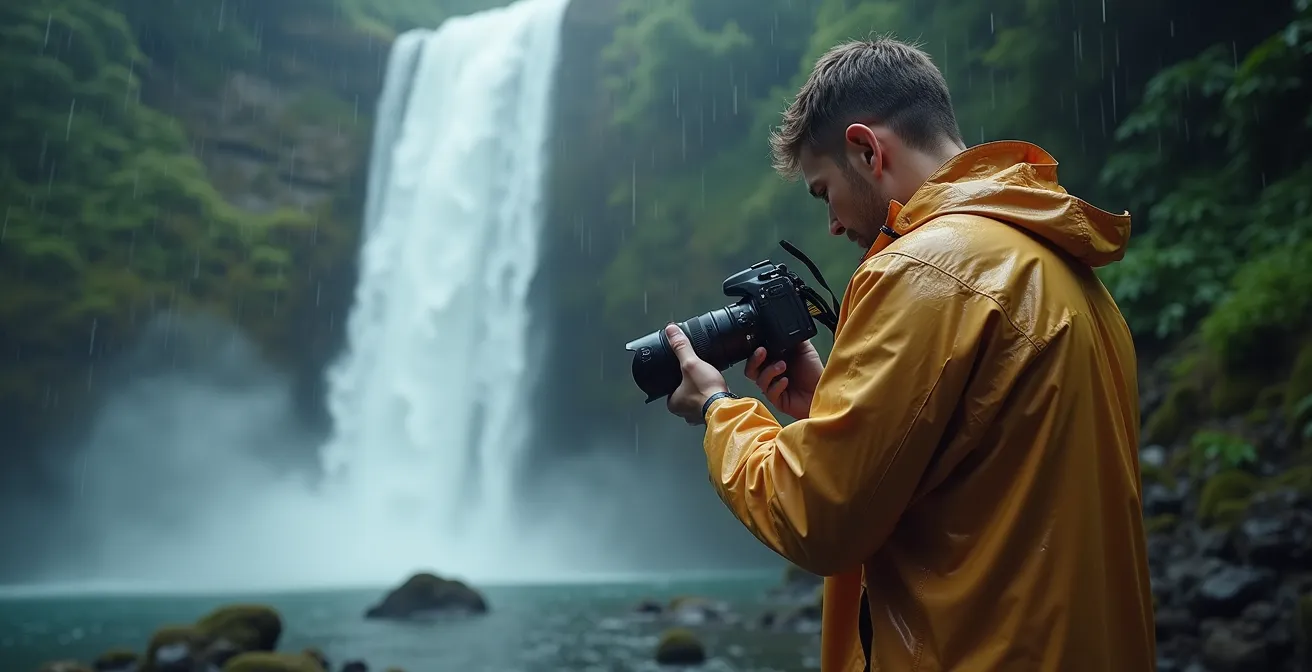
Beyond condensation, photographers face threats from dust, sand, and rain. You don’t need expensive, specialized bags to provide adequate protection. A few simple, low-cost items can create a surprisingly effective hostile environment kit, allowing you to get the shot without risking your gear. This is about being resourceful, a key trait of a skilled field photographer.
Your DIY Hostile Environment Protection Kit Checklist
- Assess your environment: Identify the primary threats—humidity, cold, sand, or rain—before you head out.
- Gather your low-cost essentials: Assemble a kit including large Ziploc bags, salvaged silica gel packets, a microfiber lens cloth, and a rocket blower. A simple shower cap can also act as an excellent disposable shield against sand and light mist.
- Acclimatize your gear: When moving between temperature extremes (e.g., air-conditioned car to humid jungle), seal your camera in a Ziploc bag with a silica gel packet for at least 30 minutes before taking it out.
- Protect in the field: Use a shower cap with a hole cut for the lens to shield the camera body from dust or mist. In cold weather, keep a spare battery in an inner jacket pocket; your body heat can extend its charge by up to 40%.
- Follow emergency drying protocol: If your gear gets wet, power it off immediately, remove the battery and memory card, and use a rocket blower or compressed air to remove surface moisture. Never use rice. Place the equipment in a sealed container with plenty of silica gel packets and wait a minimum of 48 hours before attempting to power it on.
How to Edit Green Tones So They Don’t Look Radioactive?
One of the most telling signs of an amateur landscape edit is “radioactive” greens. This is where foliage, grass, and trees take on a hyper-saturated, neon-like quality that looks artificial and distracting. This isn’t always the photographer’s fault; it’s often a result of how budget cameras and smartphones are programmed. A technical analysis of smartphone sensors revealed that they are designed to boost green channel saturation by an average of 35% compared to professional cameras. This is an intentional choice by manufacturers to make photos “pop” on social media feeds, but it sacrifices naturalism.
The solution lies in a disciplined approach to editing, or what I call digital darkroom discipline. Instead of relying on one-click filters or mindlessly pushing the saturation slider, the goal is to reclaim control over your colors. The first step, if your camera allows it, is to shoot in a “neutral” or “natural” picture profile, or even better, in RAW format. This captures a flatter, less processed image, giving you maximum flexibility to shape the colors yourself. If you’re shooting on a smartphone that only produces JPEGs, your job in editing is to first undo the camera’s aggressive processing.
The key is to use the HSL (Hue, Saturation, Luminance) tools available in virtually all editing apps, including free mobile ones like Snapseed or Adobe Lightroom Mobile. By targeting the green channel specifically, you can sculpt it into something far more pleasing and natural. A professional trick is to almost always *reduce* the saturation of your greens and often shift their hue slightly towards yellow or blue to better match the scene’s overall color palette. Here are a few recipes you can try:
- Moody Desaturated Forest: In your HSL panel for greens, shift the Hue -10 (towards yellow), reduce Saturation by -30%, and lower the Luminance by -15%. Adding a hint of magenta to the shadows can create a beautiful, complementary color harmony.
- Lush Sunlit Meadow: Shift green Hue +5 (towards yellow/cyan), reduce Saturation by -20% (this is key!), and boost Luminance by +25% to create a sense of light. Add a touch of warmth to the highlights.
- Earthy Olive Grove: Push the green Hue significantly towards yellow (-15), and desaturate heavily (-40%). To complete the earthy feel, add a bit of orange to the midtones.
- Pro Tip: As a rule of thumb, start every edit of a phone photo by reducing green saturation by at least 20%. It’s the single fastest way to achieve a more professional look.
Guided Tours vs. Solo Wandering: Which Yields Deeper Cultural Insights in Europe?
For a photographer, the choice between a guided tour and solo exploration is a strategic one, balancing efficiency against creative freedom. A guided tour offers undeniable logistical advantages: pre-scouted locations, access to restricted areas, and a wealth of historical context provided by a knowledgeable local. You can cover a city’s highlights in a single day, ensuring you don’t miss the “must-see” shots. However, this efficiency comes at a cost. You are bound by the group’s schedule, often visiting prime locations at the worst time for photography (i.e., midday) and leaving little room for spontaneous discovery or waiting for the perfect light.
Solo wandering, on the other hand, is the embodiment of creative freedom. It allows you to get lost in side streets, interact authentically with locals, and—most importantly—dedicate hours to a single spot, waiting for the golden hour light to transform the scene. This is where you find the unique angles and untold stories that tour groups walk right past. The trade-off is a potential lack of context and the risk of missing key locations without proper research. For the photographer, neither approach is perfect, but they serve very different purposes.
The table below breaks down the photographic pros and cons of each approach, helping you decide which is right for your specific goals.
| Aspect | Guided Tour Advantage | Solo Wandering Advantage |
|---|---|---|
| Access to Locations | Restricted areas, best viewpoints pre-scouted | Discover unique angles missed by groups |
| Timing | Efficiently covers highlights | Stay for perfect light conditions |
| Local Knowledge | Historical context and hidden stories | Authentic interactions with locals |
| Creative Freedom | Limited by group schedule | Unlimited time for composition |
| Cost | Higher upfront, but includes logistics | Budget-flexible, pay as you go |
Ultimately, the most effective strategy is often a hybrid one. As travel photography experts on professional forums often advise:
The hybrid approach works best – use a morning tour to understand the landscape’s history and identify key locations, then return solo during golden hour to capture your unique vision without group constraints.
– Travel photography experts, Professional Photography Forums
Limited Edition Print vs. Original: Which Is the Smarter Buy for a $1,000 Budget?
As your photographic skills grow, the desire to see your work on a wall—and perhaps even monetize it—becomes a natural next step. The art market can seem intimidating, but for an emerging photographer, the world of small, limited edition prints offers a highly accessible entry point. In fact, recent photography market analysis reveals that the market for prints under $50 from emerging photographers grew by 35% in 2023, with 8×10 and 11×14 inch prints being the most popular sizes. This proves there is a real, growing appetite for affordable, original art.
For a hobbyist, creating a “limited edition” run of your best work is a powerful strategy. It introduces scarcity, which inherently increases perceived value. An edition of 100 prints feels more special and collectible than an open edition that could be printed infinitely. It also allows you to connect with buyers on a personal level. Hand-numbering each print, signing it, and including a small certificate or a written story about how you captured the image transforms a simple photograph into a complete art object. People don’t just buy an image; they buy the narrative behind it.
You don’t need a professional printing lab to start. Many online services offer high-quality printing on demand. The key is to start small, reinvest your profits, and build a reputation for quality. The “1/100 Strategy” is a simple but effective business model for any photographer looking to take their first commercial steps.
- Step 1: Curate Ruthlessly. Select your single best image. It must have both technical quality and strong emotional impact. Don’t offer 20 mediocre prints; offer one exceptional one.
- Step 2: Prepare for Print. Export the image at its maximum possible resolution and, critically, convert the color space to sRGB. This ensures that the colors you see on screen will be consistent with the final print.
- Step 3: Price for Growth. A simple formula to start is (Cost of Printing x 3) + Perceived Value. For an 8×10 print from a phone photo, a price of $25-$40 is a reasonable starting point.
- Step 4: Create Scarcity and Story. Announce it as a limited edition of 100. Hand-number each print (e.g., 1/100, 2/100). Write a short paragraph about the story behind the photo and include it with the print.
- Step 5: Reinvest in Quality. Use the profit from your first 10 sales to upgrade your paper stock. Moving from standard glossy paper to a matte fine art paper can elevate the perceived value of your work by 50% or more.
Key Takeaways
- Mastery Over Machinery: Your photographic eye and understanding of light are infinitely more valuable than your camera’s price tag. Focus on skill, not gear.
- Composition is a Language: The Rule of Thirds is just one word. Learn to speak fluently by using leading lines, framing, and symmetry to tell more compelling stories.
- The Two-Fold Discipline: Great photography requires both field discipline (protecting your gear, waiting for light) and digital discipline (subtle, intentional editing). Master both to elevate your work.
How to Choose a Craft Workshop That Will Actually Teach You a New Skill?
The desire for structured learning is a sign of a committed artist. While paid workshops can offer valuable insights, they are not the only path to mastery. In the spirit of prioritizing skill over spending, the most impactful workshop might be one you design for yourself. A self-directed curriculum of weekly challenges can be more effective than a one-off course because it forces consistent practice and deliberate focus on specific techniques. By imposing creative constraints, you force your brain to find new solutions and develop your artistic vision more rapidly than if you simply go out and “take pictures.”
Furthermore, broadening your artistic education beyond photography can yield surprising breakthroughs. A powerful case study involved a landscape photographer who attended watercolor painting workshops. Learning about color mixing, atmospheric perspective, and the painter’s technique of “working from dark to light” dramatically improved their photographic editing and their strategies for shooting in difficult light. It proved that the core principles of art are universal. Learning to see light and color through a painter’s eye made them a better photographer.
Instead of searching for the perfect workshop, consider creating your own. This “Self-Made Weekly Photography Challenge” is a free, powerful curriculum designed to break creative ruts and build fundamental skills.
- Week 1: Monochrome World. Shoot only in black and white for a week. This removes the distraction of color and trains your eye to see composition, texture, and light.
- Week 2: The Single Lens. If you have an interchangeable lens camera, use only one prime lens (e.g., 35mm). If you’re on a phone, don’t use the zoom. Master one perspective.
- Week 3: The “Bad” Light Challenge. Shoot only between 11 AM and 2 PM. Learn to find compelling images in harsh, direct sunlight by focusing on shadows, shapes, and high-contrast scenes.
- Week 4: The Ten-Shot Subject. Find one subject (a tree, a building, a park bench) and take 10 completely different, compelling photos of it over the course of the week.
- Week 5: Intentional Motion. Break the obsession with sharpness. Spend the week practicing techniques like long exposures and intentional camera movement to capture blur and motion.
- Week 6: Vertical Landscapes. Force yourself to break the horizontal habit. For one week, every landscape photo you take must be in a vertical orientation.
- Week 7: The Triptych Story. Your goal is not a single image, but a series of three connected images (a triptych) that tell a single story.
The journey from a hobbyist to a confident visual artist is not paved with new equipment, but with dedicated practice and a deeper way of seeing. Now, pick up your camera—whatever it is—and start telling the story of the world around you with intention and skill.