In summary:
- Your kitchen chair causes pain by compressing the sciatic nerve; counteract this with proper lumbar support and seat depth.
- “Tech neck” results from poor cervical spine alignment; your monitor’s top edge must be at or just below eye level.
- For stability, a full standing desk is superior to a converter, which can introduce monitor shake and keyboard bounce.
- Eye fatigue is caused by screen-to-wall contrast; use a three-layer lighting system (ambient, task, accent) to reduce strain.
- A sinking chair ruins posture; replace the gas cylinder when it fails, opting for a durable Class 4 model for longevity.
The makeshift home office, once a temporary solution, has become a permanent fixture for many remote workers. With it comes a silent epidemic of physical discomfort. That nagging lower back ache, the tension headaches, the wrist pain—these are not just minor annoyances; they are the direct result of a workspace at war with human anatomy. The common advice is to “buy an ergonomic chair” or “take more breaks,” but these are surface-level fixes that ignore the root cause.
The real problem lies in the unseen forces your workspace exerts on your body: constant compression on your spine, sustained tension in your neck and shoulders, and repetitive strain on your wrists. These forces accumulate over hundreds of hours, leading to conditions that can impact not only your comfort but also your long-term health and productivity. The solution isn’t just about acquiring better equipment; it’s about understanding the fundamental principles of biomechanics and redesigning your environment to neutralize these destructive forces.
This guide moves beyond generic tips. We will dissect each component of your home office—from the chair and monitor to the lighting and desk itself—through the lens of an ergonomist. You will learn not just what to do, but precisely *why* you’re doing it, empowering you to build a workspace that supports your body’s natural structure, prevents chronic pain, and ultimately enhances your focus and efficiency.
For those who prefer a visual summary, the following video from a certified ergonomics expert demonstrates the core principles of setting up a desk correctly. It serves as an excellent complement to the detailed anatomical explanations provided in this guide.
To systematically address each source of pain, this article is structured to guide you through the critical adjustments needed for a truly ergonomic home office. Below is a summary of the key areas we will explore to transform your workspace from a source of strain into a foundation for well-being.
Summary: A Blueprint for an Ergonomic Home Office
- Why Your Kitchen Chair Is Causing Sciatica After 4 Hours of Work?
- How to Set Monitor Height to Prevent “Tech Neck” and Headaches?
- Standing Desk vs. Converter: Which Is More Stable for Heavy Monitor Arms?
- The Lighting Position Mistake That Causes Glare and Eye Fatigue
- When to Replace Your Office Chair Cylinder Before It Ruins Your Posture?
- How to Handle a 6-Hour Time Difference Without Ruining Your Sleep Schedule?
- How to Integrate “Micro-Mindfulness” Triggers into Your Desk Setup?
- How to Transition to a Digital Nomad Lifestyle Without Killing Your Career Trajectory?
Why Your Kitchen Chair Is Causing Sciatica After 4 Hours of Work?
That sharp, radiating pain running from your lower back down your leg is a classic symptom of sciatica. The culprit is often the very chair you’re sitting on. A typical kitchen or dining chair, with its flat, hard seat and vertical back, is an instrument of anatomical torture. It forces your pelvis to tilt backward, flattening the natural curve of your lumbar spine. This posture places direct and sustained pressure on your sacrum and, by extension, the sciatic nerve. After just a few hours, this compression can lead to inflammation and pain. The scale of this issue is immense; a report from the American Chiropractic Association indicates that approximately 31 million Americans suffer from back pain at any given time.
An ergonomic chair counteracts this by design. Its primary function is to maintain the natural S-curve of your spine, even while seated. This is achieved through adjustable lumbar support, a contoured seat pan that distributes weight evenly, and the ability to set the correct height. The goal is to offload pressure from the spinal discs and nerves. It’s a global issue, as lower back pain is the single biggest cause of disability in 160 countries. To assess if your current chair is the source of your problem, perform this simple check:
- Lumbar Support Check: Your bottom should be pressed firmly against the back of your chair. A cushion or the chair’s built-in support should cause your lower back to arch slightly, not flatten or round out.
- Edge Pressure Test: There should be a gap of 2-3 inches between the front edge of the seat and the back of your knees. If the seat edge digs into your thighs, it can impede circulation and nerve function.
- Weight Distribution: Your feet must be flat on the floor (or a footrest), with your thighs roughly parallel to the ground. This ensures your body weight is supported by the chair, not your spine.
How to Set Monitor Height to Prevent “Tech Neck” and Headaches?
“Tech neck” is the clinical term for repetitive strain injury to the cervical spine. Your head weighs approximately 10-12 pounds, and for every inch your head tilts forward, the force on your neck muscles nearly doubles. When your monitor is too low, you are essentially forcing your neck to support 20, 30, or even 40 pounds of pressure for hours on end. This sustained tension in the cervical and trapezius muscles is a direct cause of neck stiffness, shoulder pain, and tension headaches. The solution is precise and non-negotiable: align your monitor to your body.
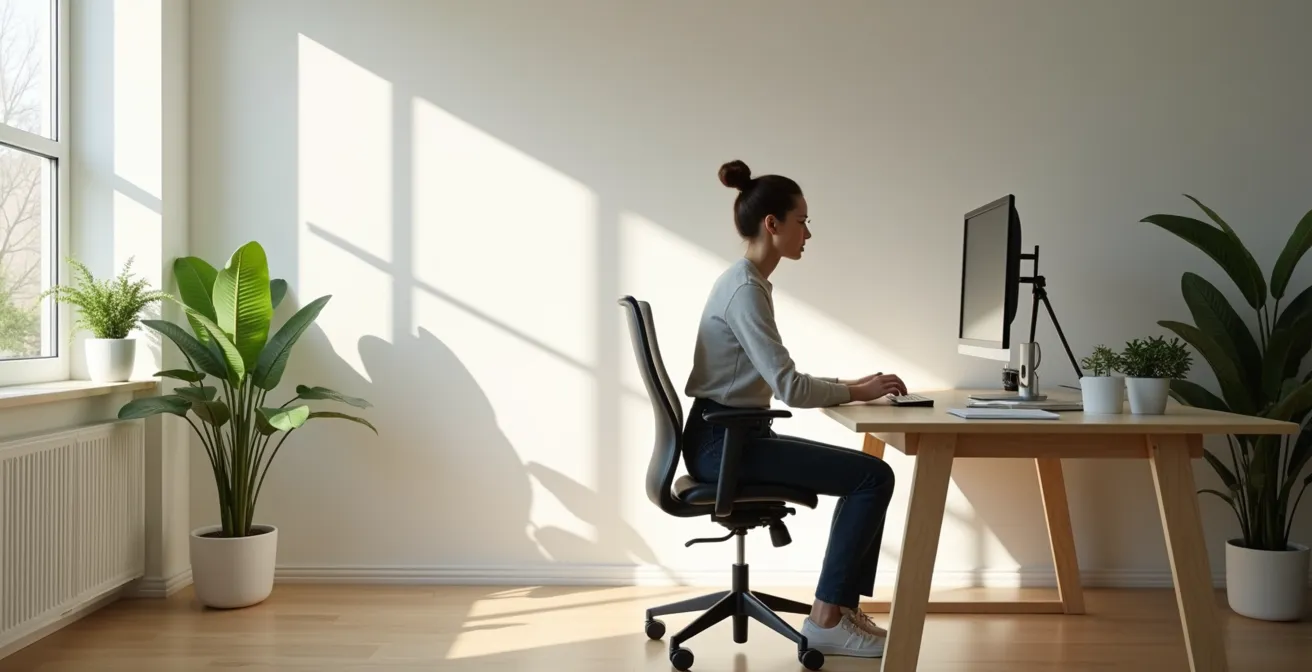
The golden rule of monitor ergonomics is that the top of your screen should be at or slightly below eye level. This encourages a neutral neck posture where your ears are aligned directly over your shoulders. To find your perfect height, use the “Natural Gaze Test”: sit comfortably, look straight ahead, and close your eyes. When you open them, your gaze should land on the top third of your monitor. If you’re looking down, your monitor is too low.

As the image demonstrates, correct alignment allows the neck to remain straight, minimizing muscular strain. If your monitor isn’t adjustable, a stack of books or a dedicated monitor stand is not an aesthetic choice but an anatomical necessity. Beyond height, consider these critical adjustments:
- Distance: Your screen should be about an arm’s length away (typically 40 to 75 cm). This prevents both leaning forward and eye strain.
- Dual Monitors: Place your primary monitor directly in front of you. The secondary monitor should be to the side, and you should turn your whole body slightly to face it, rather than just twisting your neck.
- The 20-20-20 Rule: To combat eye fatigue, every 20 minutes, look at something 20 feet away for at least 20 seconds. This simple habit allows your eye muscles to relax.
Standing Desk vs. Converter: Which Is More Stable for Heavy Monitor Arms?
The debate between a full standing desk and a desktop converter often comes down to cost and convenience. However, from an ergonomic and stability standpoint, especially when using heavy monitors or monitor arms, the choice is clear. The key factor is physics: stability is determined by the base of support and center of gravity. A full standing desk has a wide, heavy base, ensuring stability even at its maximum height. A converter, by contrast, sits on top of your existing desk, creating a higher center of gravity and a smaller footprint relative to its height. This makes it inherently more prone to wobble.
This instability is not just an annoyance; it has ergonomic consequences. Monitor shake can cause eye strain and headaches, while keyboard bounce can lead to typing errors and wrist discomfort. For users with heavy equipment, such as dual monitors mounted on a gas-spring arm, a converter’s weight capacity and stability become critical limitations. The following table highlights the key differences:
| Feature | Standing Desk Converter | Full Standing Desk |
|---|---|---|
| Stability at Height | Slight keyboard bounce and monitor shake even in best models | Excellent stability (0-20 score) at all heights |
| Weight Capacity | 30-40 lbs typical for spring/gas models, up to 80 lbs for electric | 200-350 lbs typical |
| Price Range | Under $200 basic, over $600 with monitor arms for larger models | Full electric desks available under $800 |
| Common Issues | Products extending far from base worst for monitor bounce | Requires assembly and desk replacement |
While converters offer a good entry point, a full standing desk is the superior long-term investment for serious users, providing a rock-solid platform that eliminates ergonomic compromises. However, high-quality converters can mitigate some of these issues.
Case Study: VariDesk ProPlus Stability
The VariDesk ProPlus 36 has built its reputation on exceptional stability for a converter. Its design requires no assembly; it is placed directly on an existing desk. The unit uses a dual-handle, spring-assisted lift mechanism that offers 11 distinct height settings, making the transition from sitting to standing smooth and intuitive. Its robust construction minimizes the wobble often associated with converters, making it a viable option for users who prioritize stability but cannot opt for a full desk replacement.
The Lighting Position Mistake That Causes Glare and Eye Fatigue
Eye fatigue, dryness, and headaches after a day of computer work are often blamed on the screen itself, but the real culprit is frequently your room’s lighting. The most common mistake is having a single, bright overhead light source or a window directly behind you, creating glare on your screen. Your eyes are then forced to constantly adjust between the bright reflection and the dimmer screen content, leading to a condition known as Computer Vision Syndrome. Its symptoms are well-documented and include eye strain, double vision, blurred vision, and associated neck pain as you squint and adjust your posture.
The ergonomic solution is not to work in the dark, but to create balanced, layered lighting. The goal is to reduce the contrast between your screen and the surrounding environment. This is achieved with a three-layer approach:
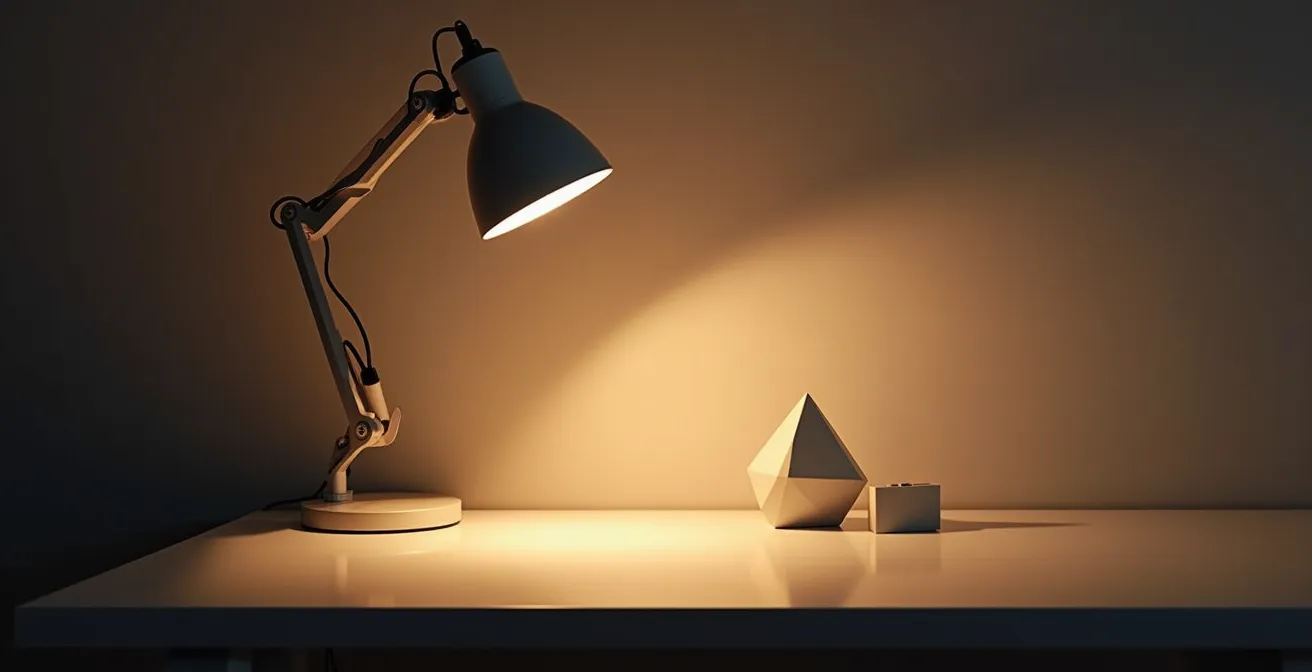
As this setup illustrates, a thoughtful combination of light sources creates a comfortable and visually balanced workspace. Implement this system with the following components:
- Ambient Lighting: This is the general, overall illumination of the room, typically from an overhead fixture. It should be at a moderate, diffuse level, not a harsh spotlight.
- Task Lighting: An adjustable desk lamp is essential. Position it to the side of your monitor (opposite your writing hand to avoid shadows) to illuminate documents or your desk surface without shining on the screen.
- Accent/Bias Lighting: This is the secret weapon against eye strain. Placing a soft light source, like an LED strip, behind your monitor illuminates the wall behind it. This dramatically reduces the contrast your eyes have to process between the bright screen and a dark background.
When to Replace Your Office Chair Cylinder Before It Ruins Your Posture?
The gas lift cylinder is the heart of an adjustable office chair, allowing you to set the perfect height for your desk. Its failure is not just an inconvenience; it’s an ergonomic disaster. The most common sign of failure is a slow, gradual sinking throughout the day. You set your height perfectly in the morning, and by lunch, you’re an inch lower. This micro-sinking completely undoes your entire setup, forcing your wrists into an upward angle to reach the keyboard, causing your shoulders to hunch, and misaligning your monitor’s position relative to your eyes. You are essentially fighting a losing battle against gravity all day.
The lifespan of a cylinder depends heavily on its quality classification. Cylinders are rated in Classes 1 through 4, with Class 4 being the most durable and reliable. While many budget chairs use lower-class cylinders that can fail within a year or two, investing in a chair with a quality cylinder pays off in longevity and consistent ergonomic support. The difference in durability is stark; Class 4 cylinders can last 8-10+ years even with heavy daily use, while Class 3 typically lasts around 5 years.
So, when should you replace it? The answer is simple: the moment it no longer holds its set height reliably. There is no “living with it.” A sinking chair is a broken chair, and it is actively degrading your posture. Replacement cylinders are widely available and relatively inexpensive, often being a more cost-effective solution than replacing the entire chair. When purchasing a new chair or a replacement part, always look for a Class 4 gas cylinder to ensure maximum durability and a stable, reliable foundation for your posture.
How to Handle a 6-Hour Time Difference Without Ruining Your Sleep Schedule?
For remote workers collaborating across continents, a significant time difference presents a challenge that goes far beyond scheduling meetings. Working late into the night to align with another time zone directly clashes with your body’s natural circadian rhythm. This disruption isn’t just about feeling tired; it has profound physiological and cognitive consequences. Exposing yourself to the blue light of a monitor at 10 PM tells your brain it’s midday, suppressing melatonin production and making restorative sleep difficult. This is a significant issue, as extended sedentary behavior is associated with higher incidences of depression, anxiety, and decreased cognitive function, a problem exacerbated by sleep disruption.
The solution lies in a strategy called Chrono-Ergonomics: consciously designing your environment to send the right signals to your brain at the right time. Instead of just pushing through the fatigue, you create an artificial “day” and “night” within your workspace. This involves manipulating light, sound, and space to support your adjusted work schedule without completely wrecking your sleep cycle.
Here is a practical plan for implementing chrono-ergonomics:
- Smart Lighting Schedule: Use smart bulbs to mimic a natural day. Program a bright, cool-toned light (around 5000K) for the start of your “work morning,” even if it’s 4 PM local time.
- Transition Lighting: As you approach your adjusted “work evening,” have the lights automatically shift to a very warm, dim glow (around 2700K). This signals to your brain that the day is ending and it’s time to wind down.
- Physical and Acoustic Zoning: If possible, create a distinct physical barrier (like a bookshelf or screen) between your workspace and your relaxation/sleep area. During your local morning (when you might be trying to sleep after a late shift), use blackout curtains and a white noise machine to create a quiet, dark sanctuary.
How to Integrate “Micro-Mindfulness” Triggers into Your Desk Setup?
Ergonomics is often focused on static posture, but a critical and often-overlooked component is movement. Sustained static loading—holding the same position for too long—is a primary cause of muscle fatigue and pain. The solution is not just to “remember to take breaks,” but to design your physical environment with triggers that prompt these breaks automatically. This is the concept of integrating micro-mindfulness into your desk setup: using physical objects and layout choices to interrupt periods of intense focus and encourage small, restorative movements.
These are not about long meditation sessions, but 30-second resets that release muscular tension and refocus the mind. The goal is to make breaking your posture a natural and unavoidable part of your workflow. Instead of relying on willpower or digital reminders that are easily dismissed, you embed the prompts directly into your physical space. Here’s how you can strategically place these triggers:
- Sensory Anchor Placement: Place a small, smooth stone or a piece of textured wood at the corner of your desk. Make a rule to pick it up and feel its texture for 30 seconds every time you complete a task. This creates a tactile, non-digital break.
- Forced Perspective Setup: Position your desk so that you have to perform a 90-degree chair turn to look out the window. This small action transforms a passive glance into a conscious micro-break that involves a gentle spinal twist.
- Analog Interruption Zone: Keep your notepad and pen slightly out of comfortable reach, forcing a small stretch every time you need to jot down a note. This simple inconvenience is an ergonomic benefit.
By thoughtfully designing your desk layout, you create a system that works with your psychology, not against it. You can audit your own space for these opportunities.
Your 5-Point Desk Mindfulness Audit
- Points of Contact: List every physical item on your desk you touch regularly (mouse, keyboard, cup, phone). Can any be repositioned to encourage a stretch?
- Visual Pathways: Inventory what you see when you look up. Can you reorient your desk to force a turn to see a pleasant view, creating a deliberate break?
- Hydration Station: Is your water bottle within arm’s reach? Move it to a spot that requires you to stand up briefly to get a drink.
- Sensory Variety: Are all your desk surfaces smooth plastic or metal? Introduce a new texture (a small plant, a wooden pen holder) to act as a sensory anchor.
- Posture Reset Triggers: Pair an hourly digital alarm with a physical action. When the alarm sounds, you must touch a specific object on the other side of the room.
Key takeaways
- Anatomy Over Aesthetics: The primary goal of an ergonomic setup is to support your spine’s natural curve and maintain neutral joint positions, not to follow a design trend.
- Neutralize Harmful Forces: Your setup should actively work to counteract the forces of compression (on your spine and wrists) and tension (in your neck and shoulders) that prolonged sitting creates.
- Your Environment Shapes Your Behavior: Design your physical workspace with intentional triggers for movement, breaks, and posture resets to build healthy habits automatically.
How to Transition to a Digital Nomad Lifestyle Without Killing Your Career Trajectory?
For many, the digital nomad lifestyle represents the ultimate freedom. But this freedom comes with a hidden ergonomic risk that can directly threaten your career. Working from café chairs, hotel beds, and airport lounges without the proper support can lead to chronic musculoskeletal disorders (MSDs). These conditions aren’t just painful; they degrade your ability to focus, reduce your productivity, and can ultimately compromise your capacity to work. In the United States alone, MSDs account for an estimated USD 50 billion in annual costs to employers, a testament to their severe impact on work capacity.
Therefore, transitioning to a digital nomad lifestyle requires a strategic shift in mindset: viewing ergonomics not as a luxury, but as a critical investment in your career’s longevity. Investing in a portable ergonomic setup is an investment in your uptime, your focus, and your professional output. The evidence is clear: ergonomic interventions are proven to reduce pain intensity and significantly lower the odds of developing debilitating conditions like lower back pain. Your ability to perform at a high level, meet deadlines, and advance your career is directly tied to your physical well-being.
A non-negotiable part of a sustainable nomad toolkit is a collection of lightweight, effective ergonomic tools. This portable office ensures you can create a safe and productive workspace anywhere in the world.
- Lightweight Laptop Stand: The single most important item. It raises your screen to eye level, instantly fixing your neck posture. Look for models under 2 lbs.
- Compact Split Keyboard: Allows your hands and wrists to remain in a neutral, untwisted position, preventing carpal tunnel syndrome.
- Vertical Mouse: Keeps your forearm in a natural “handshake” position, reducing strain on the wrist and elbow.
- Inflatable Lumbar Cushion: Turns any chair—from a hard café seat to an airplane seat—into a source of crucial lower back support.
- Portable Peripherals: A foldable fabric background, clip-on ring light, and lavalier microphone ensure you maintain a consistent, professional presence in video calls, reinforcing your reliability regardless of location.
Ultimately, designing a pain-free home office is an act of proactive self-care that pays professional dividends. By taking control of your physical environment and applying these anatomical principles, you are not just alleviating discomfort—you are investing in your long-term health, focus, and career sustainability. Begin today by auditing your current setup and implementing one of these changes to build a workspace that works for you, not against you.